Uzbekistan Evisa Guide: How to Apply Without Issues
Disclaimer: Some links on this page may be affiliate links. If you purchase anything through them, I will receive a small commission at no extra cost to you! Further details in the Privacy Policy.
Having problems with the Uzbekistan evisa application? Then you’re in the right place. I’m here to take you through the process step-by-step and hopefully avoid issues.
I say “hopefully” because to be honest, the Uzbekistan evisa website is one of the most amateur examples of software engineering that I’ve ever come across. You will find more bugs here than in any tropical rainforest across the world.
As a Brit I’m lucky not to need an Uzbek evisa. Unfortunately my girlfriend isn’t so fortunate with a Paraguayan passport, and that’s what led to me discovering just how painful this process is.
On the plus side, we cracked the code after several days of trying, and have pretty much become experts in applying for this thing now.
One thing to note: once you receive an email with an activation code, you have successfully made it towards the end of the application process, and must pay for the visa within 12 hours. If you do not do this, then click on the same activation link, then you will be locked out of applying for another 12 hours.
In the guide below, look for an image at the end of most sections showing what that particular part of the process should look like.

Step 1: Home Page
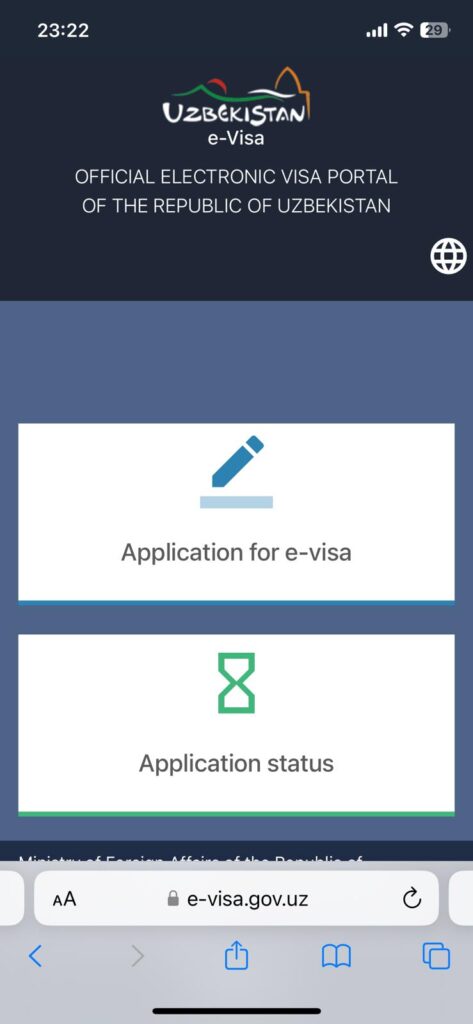
You will need to visit the Uzbekistan evisa website to start this process. This page is easy to surpass. You simply click on “Application for e-visa”.
Make sure you use the website in the link above as this is the official website. Other sites will at best charge higher fees for processing your application, and at worst be scam sites.
Step 2: Country Page (Citizenship, Document Type, Visa Entry Type and Purpose of Visit)
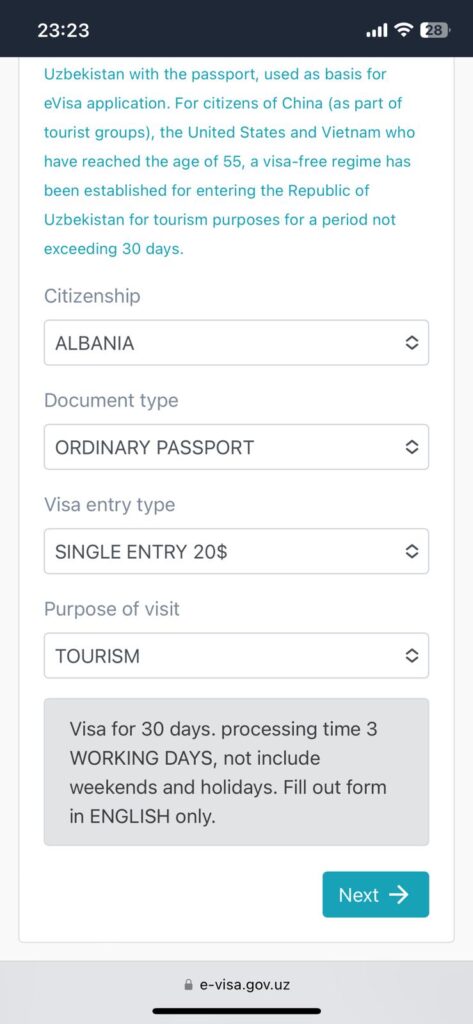
From the home page, you will reach the country page, which looks like what you see in the picture below. This one is easy to fill out. Here’s how:
- Citizenship: Select your country from the list available. If it says “Visa for X days. processing time 3 WORKING DAYS, not including weekends and holidays. Fill out form in ENGLISH only.” then I’m afraid you have to go through this arduous process. If your country has visa-free entry to Uzbekistan, it will tell you that and you won’t have to fill this out. Lucky you!
- Document Type: Select “ordinary passport”.
- Visa Entry Type: Choose single entry for US$20, double entry for US$35 or “multiply” (multiple entry… despite telling you to fill this out in English, the English used on this site is pretty broken) for US$50. Oh, and expect a US$1.50 booking fee at the end on top…
- Purpose of Visit: You have two options and will probably require “tourism”, although there is another option for “business” if that’s what you need instead.
Step 3: Date Page (Select Your Expected Entry and Exit Dates)
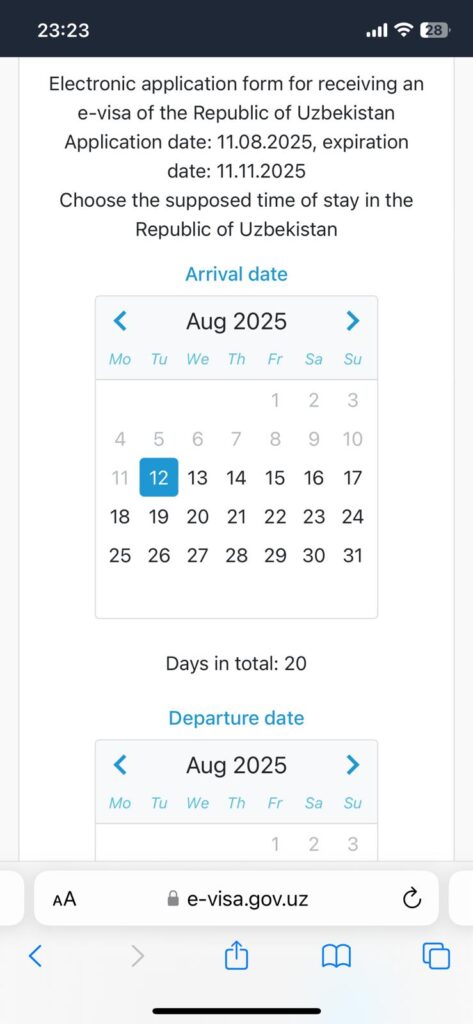
The next page is another simple one. Choose the dates that you plan to be in Uzbekistan between.
If you don’t know, that’s fine. However there is one important thing to know here. You cannot enter the country earlier than your selected arrival date.
If you select August 20th as your arrival date and August 30th as your departure date, then your visa will be valid from August 20th until September 18th (30 days later). This means you can enter the country at any point from August 20th onwards, and must exit before September 18th at the very latest.
If you select these dates, but enter on August 23rd and leave on August 29th, that is fine. You will have no problems entering and your visa will be valid.
If however you try arriving on August 19th, you won’t be able to enter Uzbekistan as your visa won’t yet be valid.
Step 4: Personal Details Page (Information About the Applicant, Passport Information and Additional Information)
The personal details page is divided into three sections: information about the applicant, passport information, and additional information.
Step 4A: Information About the Applicant
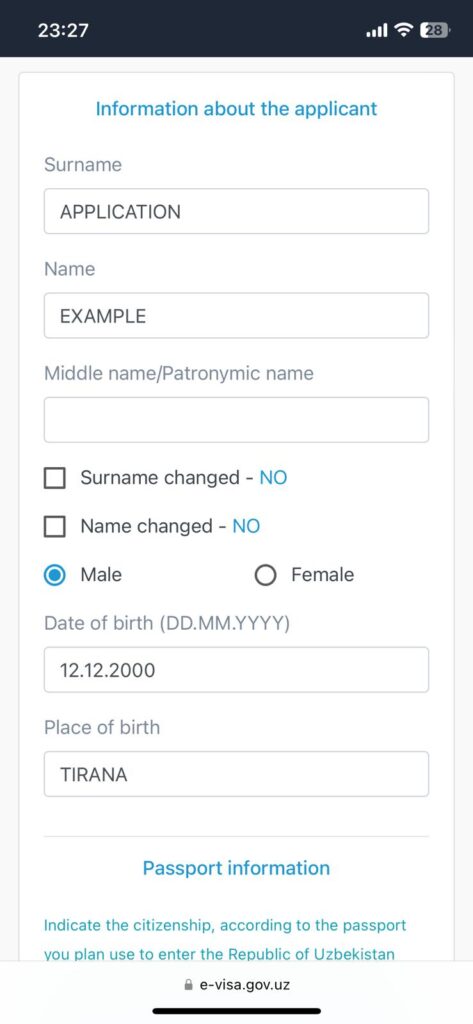
First up is the information about the applicant section.
Under “surname” put all of your surnames. Different countries have different naming conventions, therefore it’s tricky to tell you what to put without knowing your name. However, every surname should be included in this box.
Under “name” use all the given names in your passport. If you’re an Englishman named Michael William Smith, then your surname would be Smith, your name would be Michael William, and you should leave the middle name box blank.
Admittedly a little confusing as you would generally consider “William” to be your middle name in this example.
If your passport specifically states a “middle name”, that is when you would use the middle name section here.
If you have ever changed your name or surname, then you will need to tick the box that says “name changed” and/or “surname changed” and type in any past names you had.
The gender section is self-explanatory. Simply select either “male” or “female” depending on what is in your passport.
Under “date of birth” you must write it in the DD.MM.YYYY format. Using dots to separate the day, month and year is important. For a day or month with a number below 10, be sure to put a 0 rather than just “9” for example.
An example date of birth: 05.08.1997
Under “place of birth” you must use the place of birth that is listed in your passport.
Step 4B: Passport Information
Another easy section.
“Series and number” may sound confusing at first, but it’s just your passport number. If you also have a series to add, you will know about it.
For my girlfriend’s Paraguayan passport, there was no series to add, and because it only has a short number, the form automatically added a couple of dashes afterwards which meant it looked like this “A123456__”. Don’t worry about the dashes, these are normal for shorter numbers.
For the “date of issue” and “expiration date” sections, you must select those dates as shown in your passport.
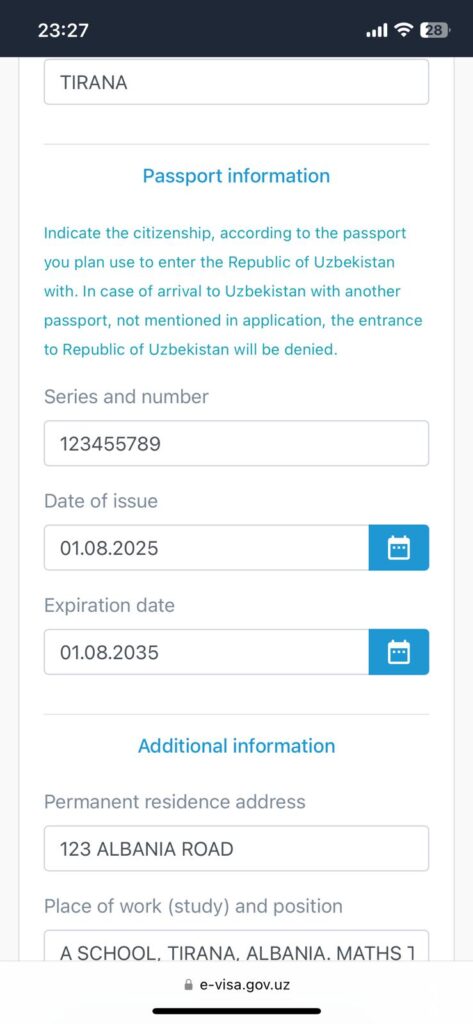
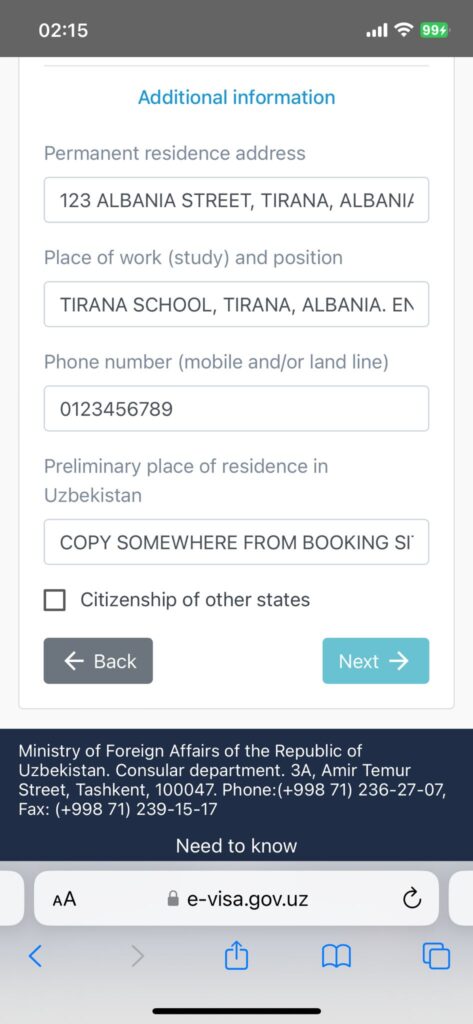
Step 4C: Additional Information
This one isn’t hard either.
Under “permanent residence address” select the address you live at back home.
For “place of work (study) and position” you should provide as much detail as possible to ensure your visa application goes smoothly. Name your place of work (or where their main office is based if you work remotely). Then give the location. Lastly provide your job title.
The phone number section is simple. Type it with your area code. However you cannot insert “+” into this box as only numbers will work.
For “preliminary place of residence in Uzbekistan” just copy the address of any accommodation in the country from a booking website such as Booking, Hostelworld or Airbnb. You don’t actually need to book the place. Make sure the address only uses the Latin alphabet with no special characters, as the form specifies that it should be filled in English only.
Only tick the “citizenship of other states” box if you have dual citizenship. Otherwise ignore it. If you do tick this box, you just need to select the other country you are a citizen of from a dropdown box.
Step 5: Photo and Passport Page
“Alex, you told me applying for an Uzbekistan evisa would be difficult, this is really easy!”
Congratulations. You’ve just reached the part of this process where things get tricky. This section is an absolute nightmare and will have you tearing your hair out by the end.
You just need to upload two pictures. One must be a passport-style photo of yourself. This means a headshot down to your shoulders with a neutral facial expression and no glasses, caps or other obstructions. You must have a plain white background behind you.
The other must be of your passport’s information page with your names, date of birth, passport number and other information. It must be clear with nothing in the photo obstructing any of the information.
The fun starts with the fact that the photo of yourself must meet these requirements:
“The photo must have a size of 35×45 mm with a resolution of 300 dpi. Image dimensions should not exceed 1 Mb. The photo must meet the standards ICAO“.
They’re helpful enough to provide a link to a defunct page that once had the appropriate information on it…
The passport information page doesn’t follow these requirements so strictly. That one you can upload and shouldn’t have issues with unless it’s a massive file. Just use a free online compression tool if it doesn’t work… although the useless system won’t specify that this is the problem rather than the photo of you…
It is the photo that will probably cause you problems. You must meet the exact requirements specified. Below you can read how.

Step 5A: Resizing Your Photo to Under 1MB
Go to the image resizer website, and upload your photo there.
Once you see a large column on the left of the screen (from a desktop rather than mobile) with a big blue “export” box, scroll down to “target file size”.
In here put anything under 1MB. If you put 900KB that will work fine.
Then click the “export” button.
Then click “download image” to download it to your device. Make sure it’s saved as a .jpg image if that isn’t done automatically.
I had difficulties when editing photos to meet the exact requirements on my laptop, then sending them to my phone. My advice is to do this entire process on a laptop or desktop, aside from step 5B (below) which needs a phone app.
Step 5B: Ensuring Your Photo Meets the 35mmx45mm Requirements
After this, you should save the image onto your phone, and use an app called “Passport Photo – ID Photo App” created by Yarsa Labs.
Open the app and select “new photo”. Then scroll down and choose the “Uzbekistan” option. Unlike with other countries, there is only one choice, and it will automatically ensure your picture meets the 35mmx45mm requirements.
On the next page, select “gallery” and upload your photo from there.
Select “start editing” then “continue with ads” and wait for the ad to finish.
Choose “next”, then “next” again, then you will reach the “crop photo” page. Ensure your face is within the circles on the screen.
Then select “next” followed by one final “next”. After that you will see a “save” option in the top-right corner. Tap on this, then “watch ad and save”.
When this is done, reupload the photo to your computer.
Step 5C: Changing the DPI
Open this website and the default DPI is already set to 300. Simply upload your image and it will create a new version of it with the correct DPI. Save this to your computer.
Step 5D: Successfully Uploading the Photo
You can finally go back to the evisa application and upload your new 35mmx45mm photo with a DPI of 300.
You should then be able to click “next”.
On the next page you will be able to see all the details you have filled in. If any are incorrect, then go back to the relevant page to change the information.
Once you are sure everything is accurate, scroll to the bottom and you will see two boxes.
In the first, it asks for your email address. Type that in.
In the second it wants a CAPTCHA code. Fortunately these aren’t too hard to read, and there’s no “click on the buses” nonsense which is generally so broken it would definitely warrant a place on this website.
Once you have typed this in, hit “save” in the bottom right corner.
Step 6: Activate Your Application
If successful, it should say “Application successfully saved. An email with a link to activate the receipt has been sent to your email address” although this is buried at the top of the screen so you will need to scroll back to see it.
The blue “save” button will also be replaced by a yellow one that says “to receive a letter”. Click that one too. It should say “The receipt activation link has been sent again to your email address An email with a link to activate the receipt has been sent to your email address” at the top now.
If unsuccessful, it will often be because the CAPTCHA has (allegedly) been typed incorrectly, or because the form doesn’t like your photos and gives the error “Photo is not comply with ICAO standards.”
In this case, go back through this guide to ensure the photos fit the exact requirements requested. Take new photos and start the process again if you have to.
Once successful, check your emails and click on the activation link. You will be provided with a code in the email. After clicking on the link, copy this code in and you will be able to pay.
Step 7: Payment
After typing in your code from the activation link, you will be shown the page full of your details once again.
However, this time it will be blank.
Don’t panic, that’s just the buggy system, and there’s nothing actually wrong with your application. Click directly on the payment tab without clicking on any previous sections and fill out your card details to pay the fee. Then wait. You must complete the payment within 12 hours of receiving the activation code. A US$1.50 booking fee is added on top of the visa cost.
The visa should be processed within 3 working days.
I assumed the blank page was a problem, and did not pay. I next looked over 12 hours later, fresh after a good sleep to try and solve this problem.
I went back to the email and clicked on the activation link again. Don’t do this!!!
Once the activation link has expired after 12 hours, it cannot be used again. If you click on it a second time, it will lock you out of applying using the same passport details until another 12 hours have passed.
Step 8: Receiving the Visa
Congratulations, you’re almost there!
At this point you’re probably expecting an email to come through within the promised 3 working days to let you know if your application has been successful or not.
However, we’re talking about the Uzbekistan evisa site here, so don’t expect things to work so smoothly…
Instead, you must go back to the visa portal home page and click on “application status”
Copy the application code from the email you received in step 6, and paste it into the “Enter the application code, received by e-mail” box.
Important: make sure there is no space before or after the code, as it otherwise won’t work.
In the “Enter text from image” box, type in the CAPTCHA code below. Then hit “check status”.
Congratulations, you hopefully now have your evisa sorted! If rejected, then you may have to go through the entire process again (and pay again…). However, you should only do this if you made any clear errors in your application. If there are none, contact an Uzbekistan embassy to find out where you went wrong, and learn what your options are.
Now you can explore this wonderful country, before perhaps crossing into mysterious Turkmenistan, enjoying the nature of Kyrgyzstan, heading into the offbeat country of Tajikistan, or going north for a more Soviet experience in Kazakhstan.